Content Filtering
What Is Content Filtering?
Content Filtering lets you set up automatic rules that scan incoming (and outgoing) emails for specific words, phrases, senders, or patterns — and then take an action based on what’s found. Think of it as a custom rule engine that runs on every message before it hits your inbox.
Common uses include automatically sorting newsletters into a folder, blocking emails from specific senders, flagging messages that contain certain keywords, or bouncing unwanted mail entirely.
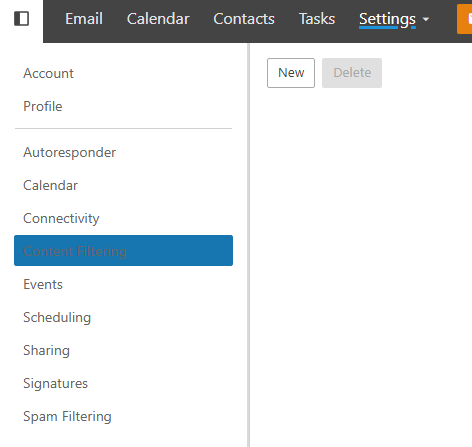
Accessing Content Filtering
Click on Settings in the top bar.
Select Content Filtering from the left-hand sidebar.
Creating a Content Filter
Click New to create a new filter rule.
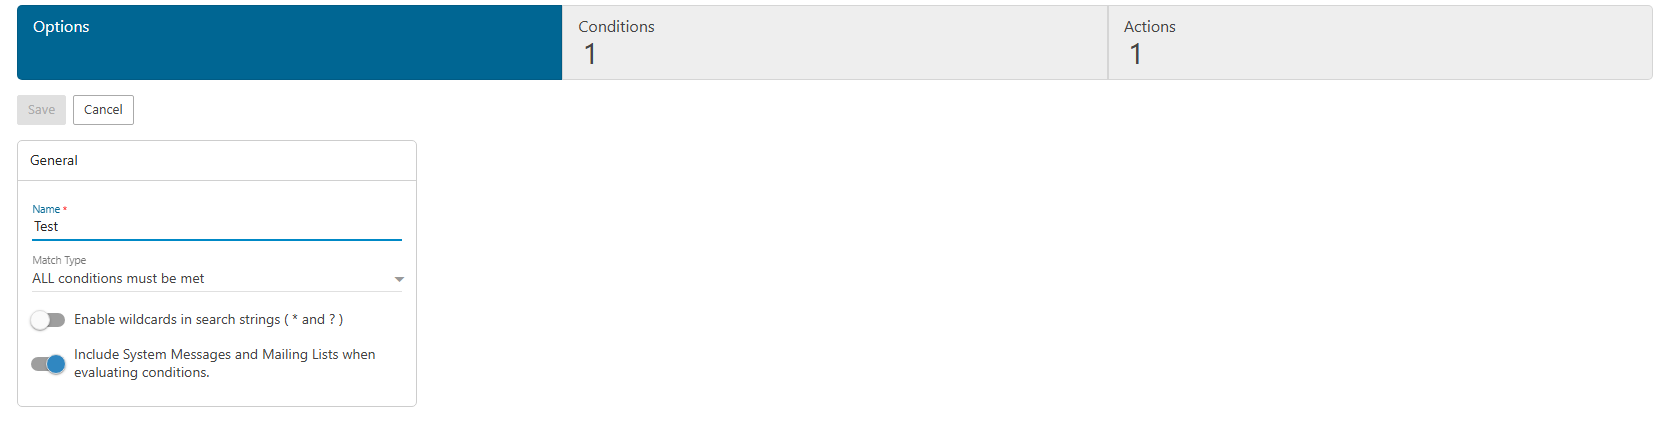
Give your filter a descriptive Name so you can identify it at a glance later (e.g. “Move Newsletters”, “Block Promotions”, “Flag Urgent”).
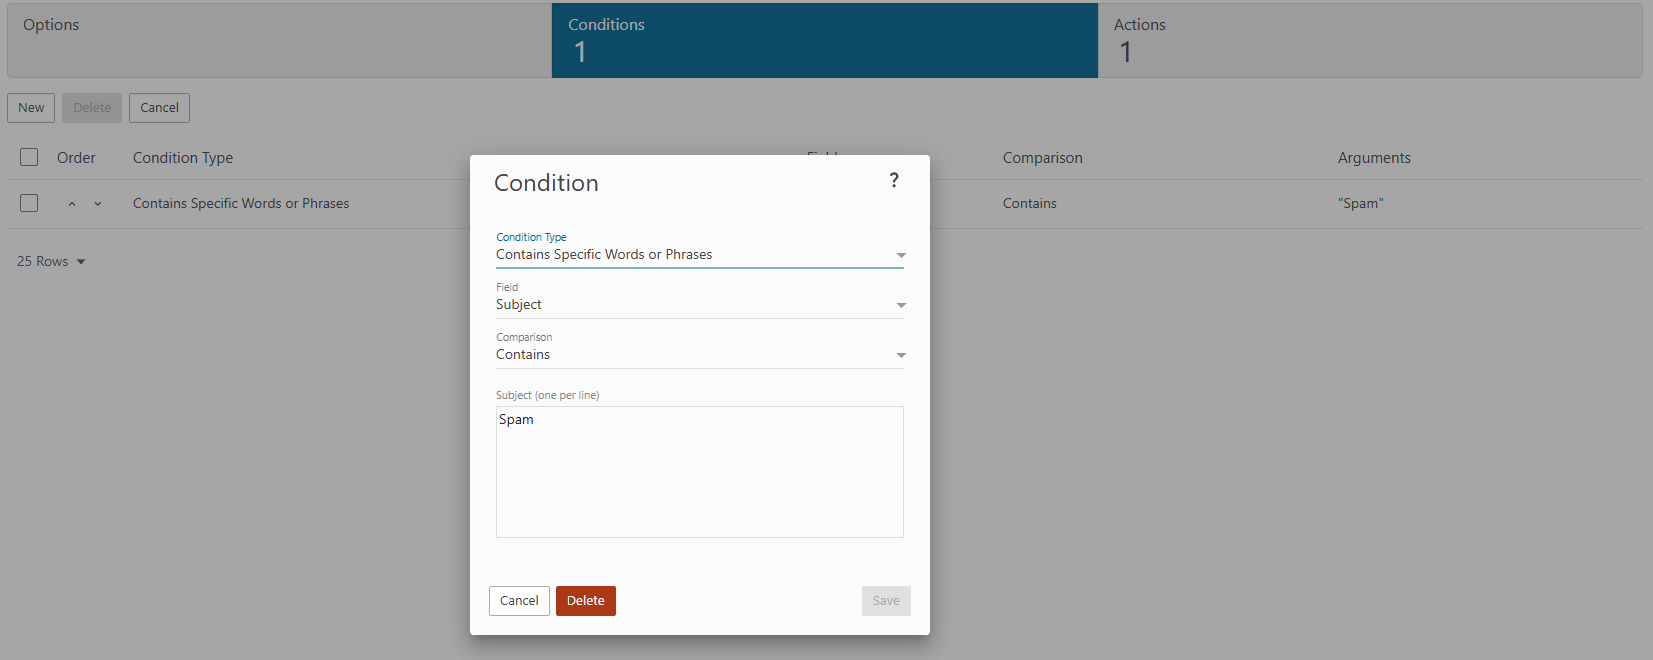
Setting Conditions
Switch to the Conditions tab to define what triggers this filter. You can match on a wide range of criteria, including:
- From / To / CC — filter by sender or recipient address
- Subject — match specific words or phrases in the subject line
- Body — scan the message body for keywords
- Has Attachment — trigger based on whether the email has a file attached
- Message Size — filter by how large the email is
- Spam / Virus Score — act on messages that cross a certain spam threshold
You can combine multiple conditions and choose whether all conditions must match or any one of them is enough to trigger the rule.
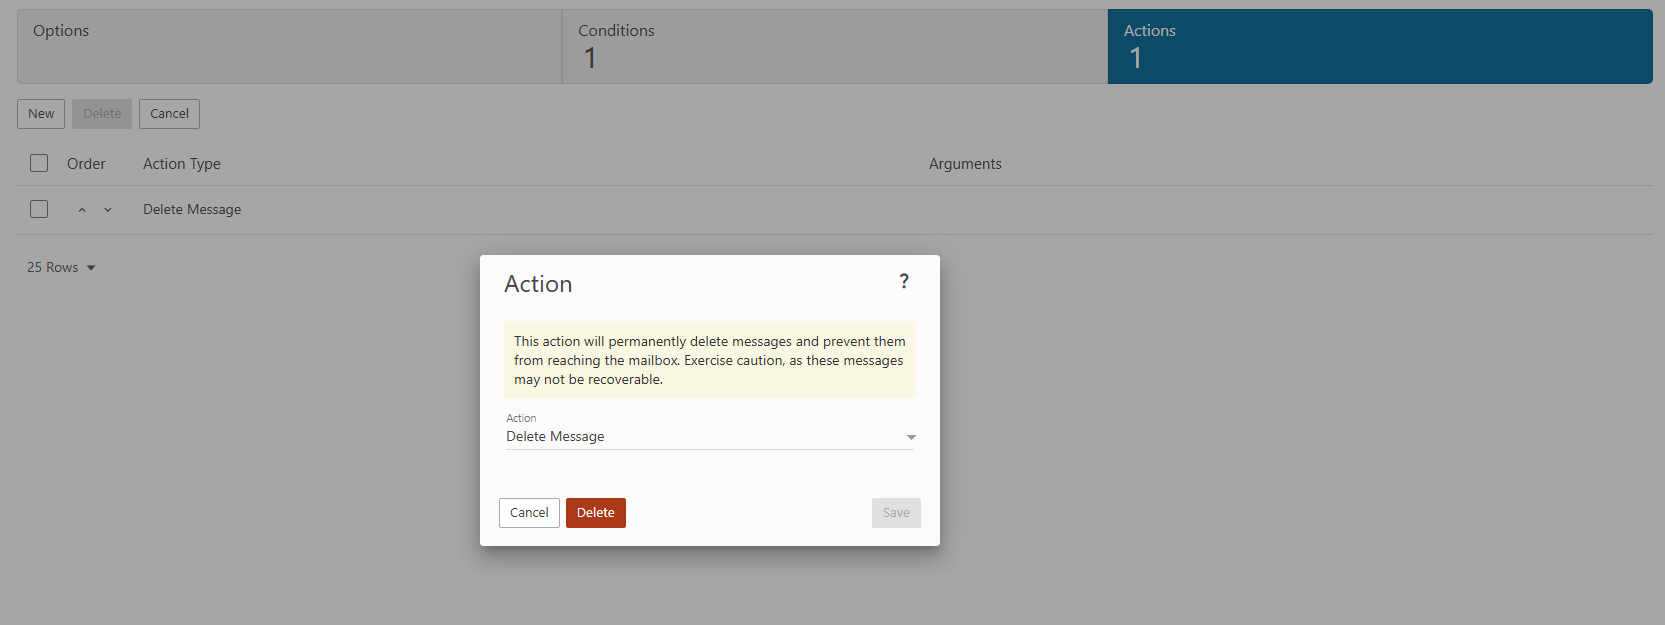
Setting Actions
Switch to the Actions tab to define what happens when a message matches your conditions. Available actions include:
- Move to Folder — automatically file the message into a specific folder
- Delete — permanently remove the message
- Bounce — send a rejection notice back to the sender
- Mark as Read — skip the unread notification
- Flag / Star — mark the message for follow-up
- Forward — redirect the message to another email address
- Set Spam Score — adjust how the message is treated by your spam filter
- Once your conditions and actions are configured, click Save. The filter will apply to all incoming messages going forward.
Tips
- Order matters. If you have multiple filters, they run in the order they’re listed. Put your most specific or high-priority rules at the top.
- Test before committing. If you’re setting up a delete or bounce action, consider using “Move to Folder” first so you can verify the right messages are being caught before anything gets permanently removed.
- Use descriptive names. As your filter list grows, clear names like “Block: [email protected]” or “Sort: GitHub Notifications” make it much easier to manage.
Note
Content filters you create here apply only to your own account. Domain-wide filtering rules are managed separately by your domain administrator.