Calendar Settings
What Are Calendar Settings?
Calendar Settings let you personalize how your calendar looks and behaves. From display preferences to automatic cleanup, these options help you tailor the calendar to match how you actually work.
Accessing Calendar Settings
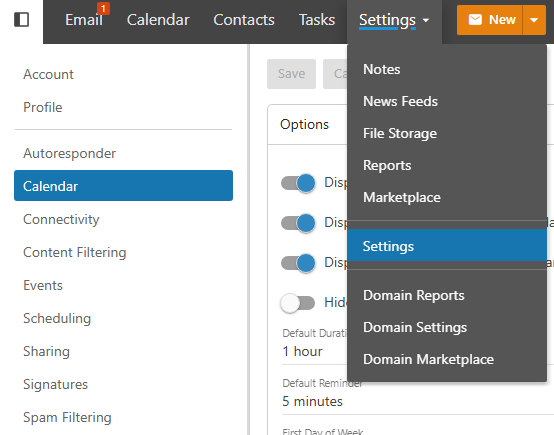
Click on Settings in the top bar.
Select Calendar from the left-hand sidebar.
Display Options
Show Weekends Toggle whether Saturday and Sunday appear in your calendar view. If your work week is Monday through Friday, hiding weekends keeps the view less cluttered.
First Day of the Week Set whether your calendar week starts on Sunday or Monday, depending on your preference or regional standard.
Show Task Start and Due Times When enabled, tasks with set start or due times will appear on the calendar grid alongside your events, giving you a unified view of everything on your plate.
Default Event Duration Set how long a new event is by default when you create one. For example, if most of your meetings are 30 minutes, set this to 30 so you’re not adjusting it every time.
Default Reminder Choose how far in advance you want to be reminded of events by default. This applies to all newly created events unless you override it on a per-event basis.
Business Hours
You can define your working hours for each day of the week. This visually separates your business hours from non-working hours in the calendar view, making it easier to see at a glance when you’re available.
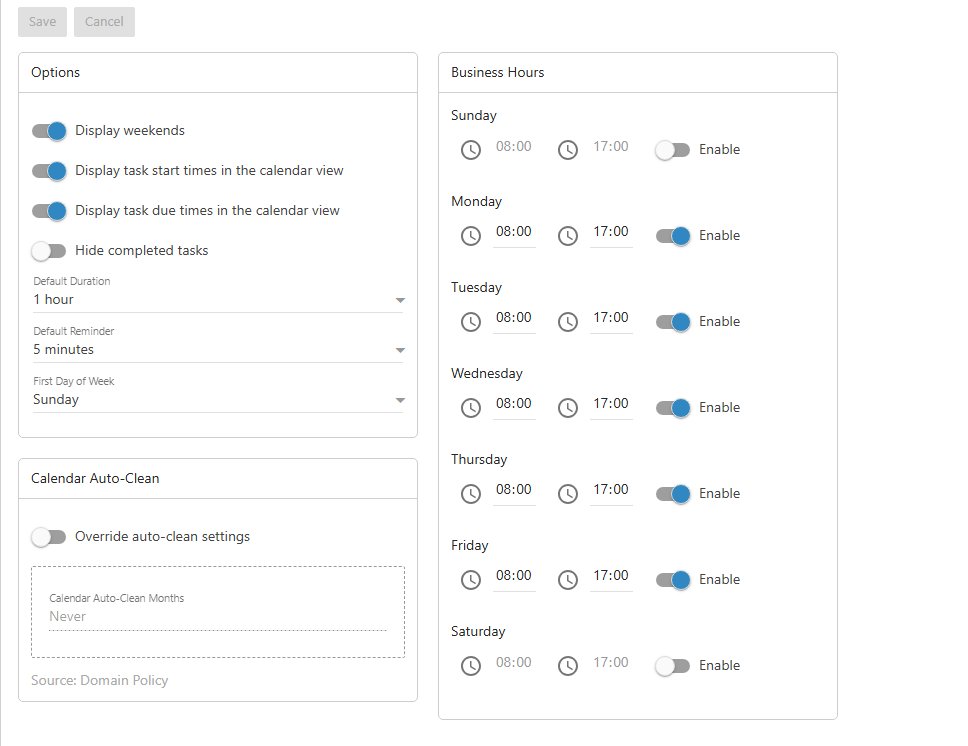
This is also useful when sharing your calendar with others — they’ll be able to see your working hours and schedule meetings within those windows.
Auto Clean Settings
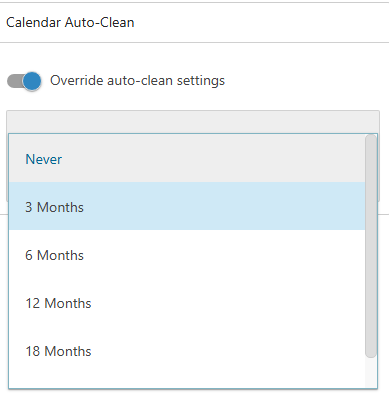
Override Auto Clean Settings This option lets you automatically remove old calendar events based on how many months old they are. For example, you can set it to purge events older than 12 months to keep your calendar from accumulating years of past entries.
Note
Auto clean is permanent — deleted events cannot be recovered. Make sure you’re comfortable with the timeframe you set before enabling this.
Saving Your Settings
Once you’ve configured everything to your liking, click Save to apply the changes.